
Required
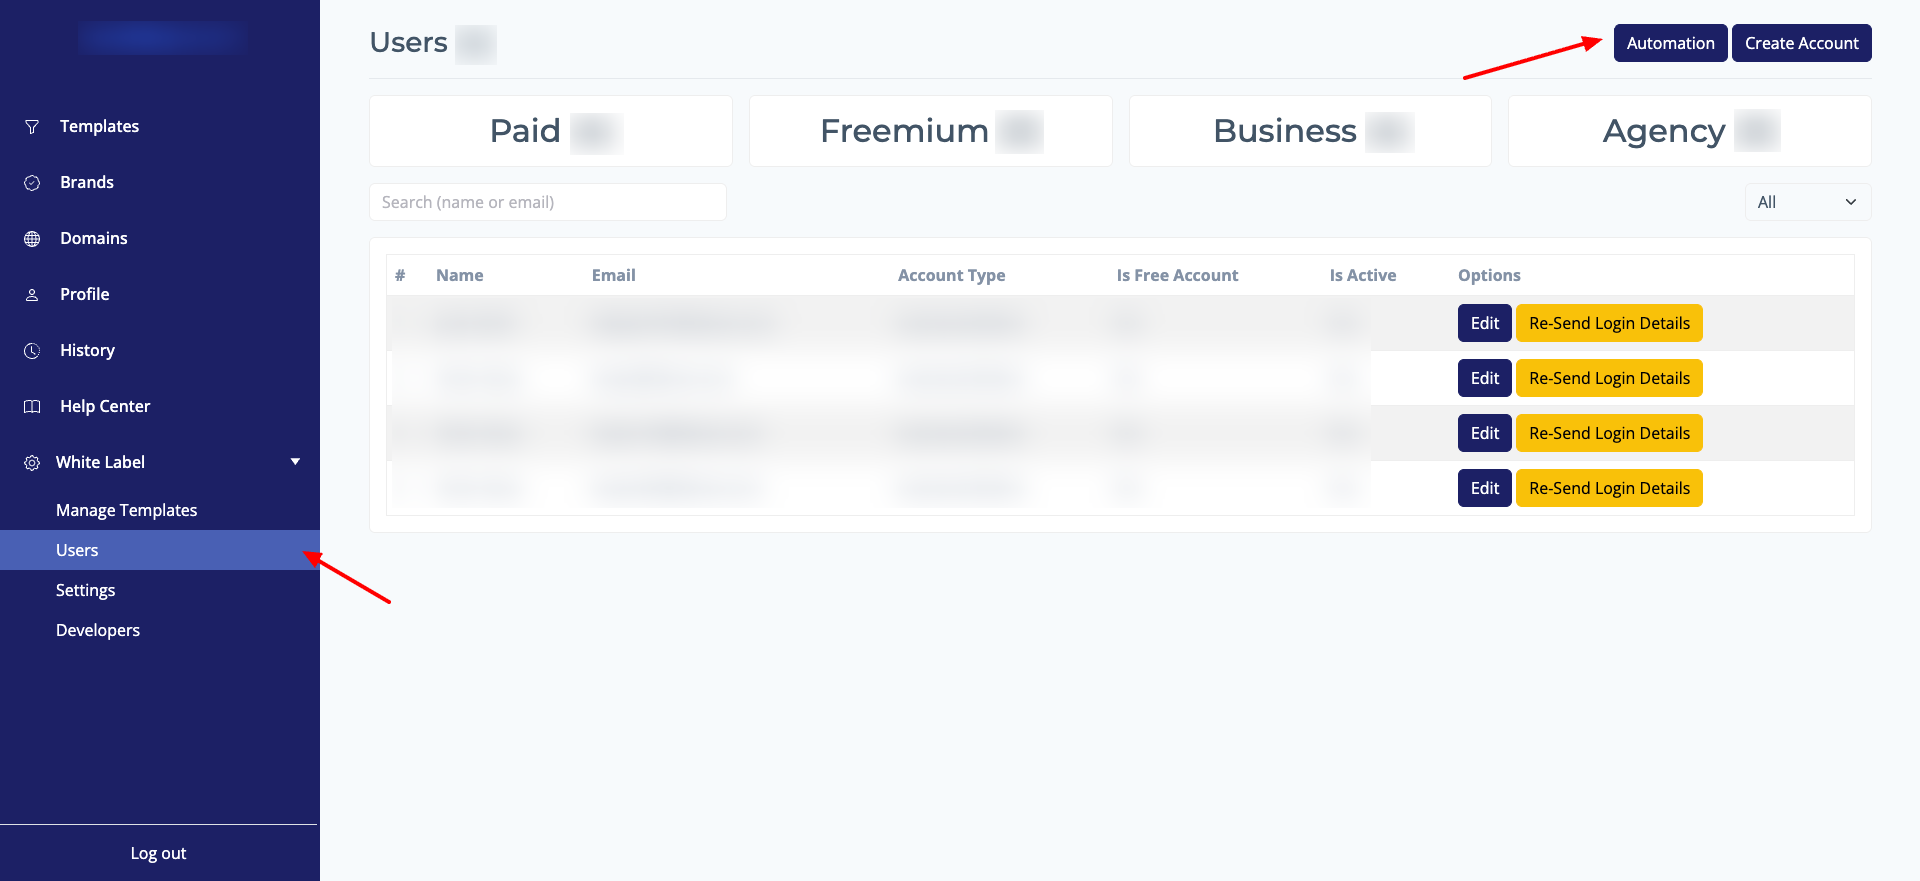 To get started, you will need your AiFunnels Api Key.
- You will find your api key when you click Automation button in White label -> Users page
- Warning: This is a secure credential. Do not share it publicly.
Step 1: Add a Custom Domain in AiFunnels
Before you begin, make sure you have added and configured a custom domain within your AiFunnels account. This is a required prerequisite for the webhook to work correctly.Step 2: Create a New GHL Workflow
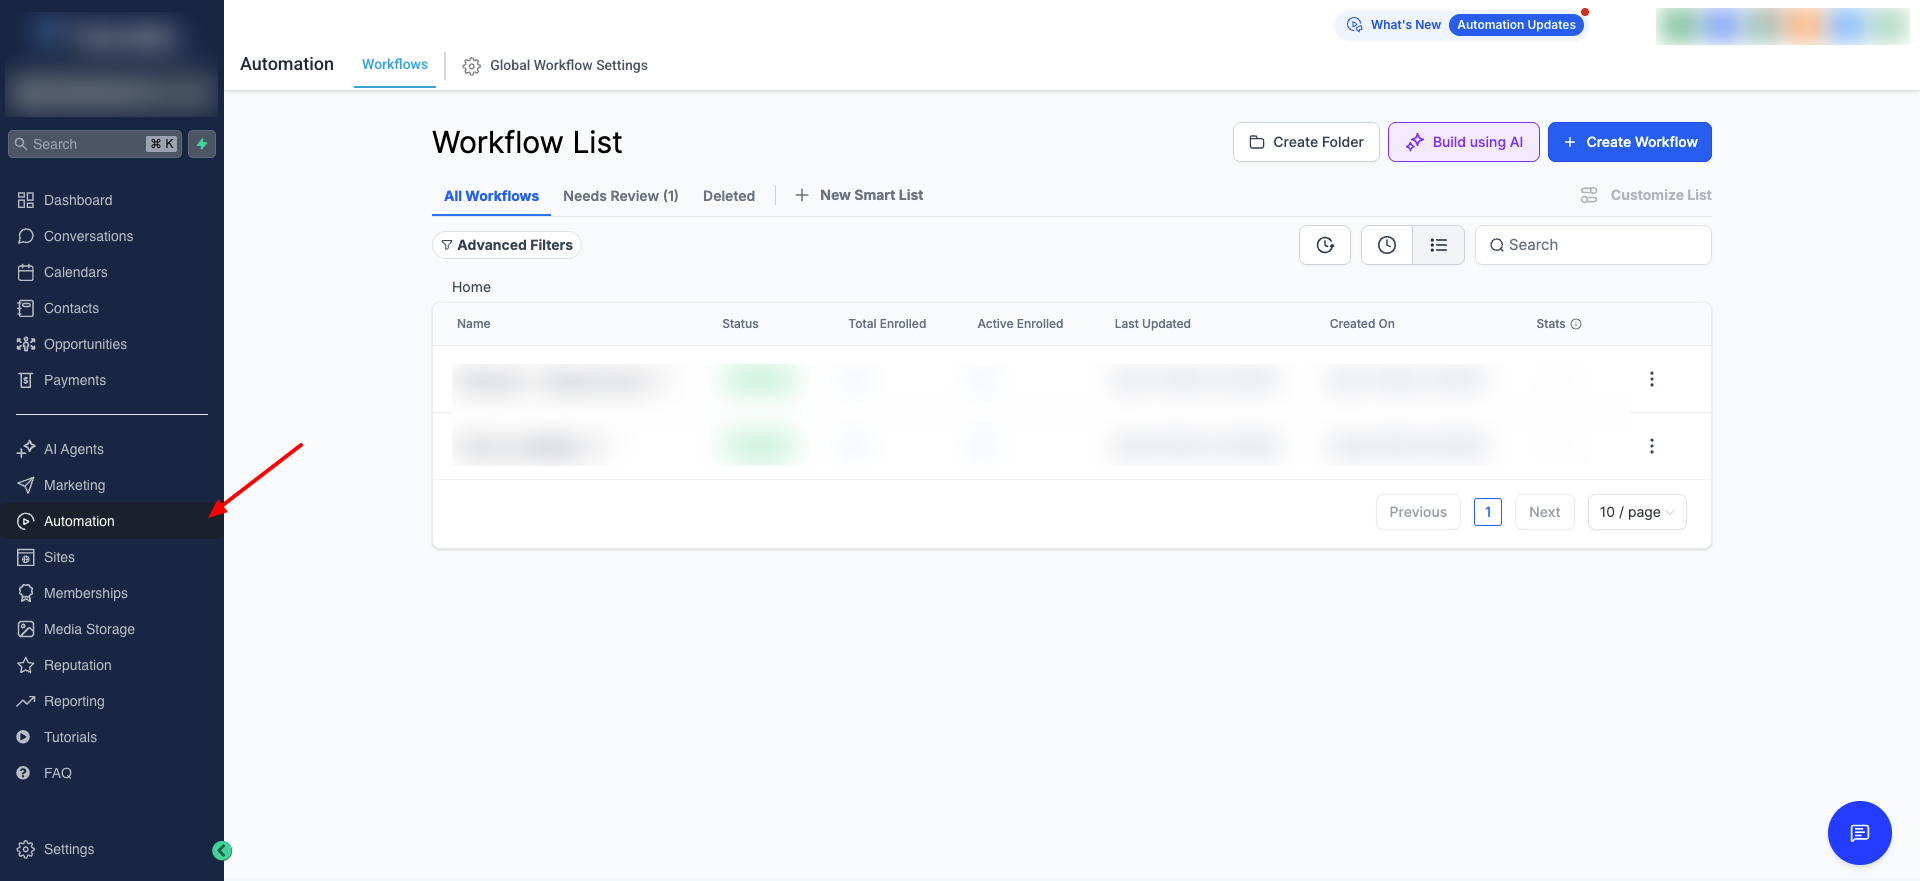
- In your GoHighLevel account, navigate to the Automation page where you will see workflows.
- Create a new workflow or open an existing one that you want to integrate with AiFunnels.
Step 3: Add a Custom Webhook Action
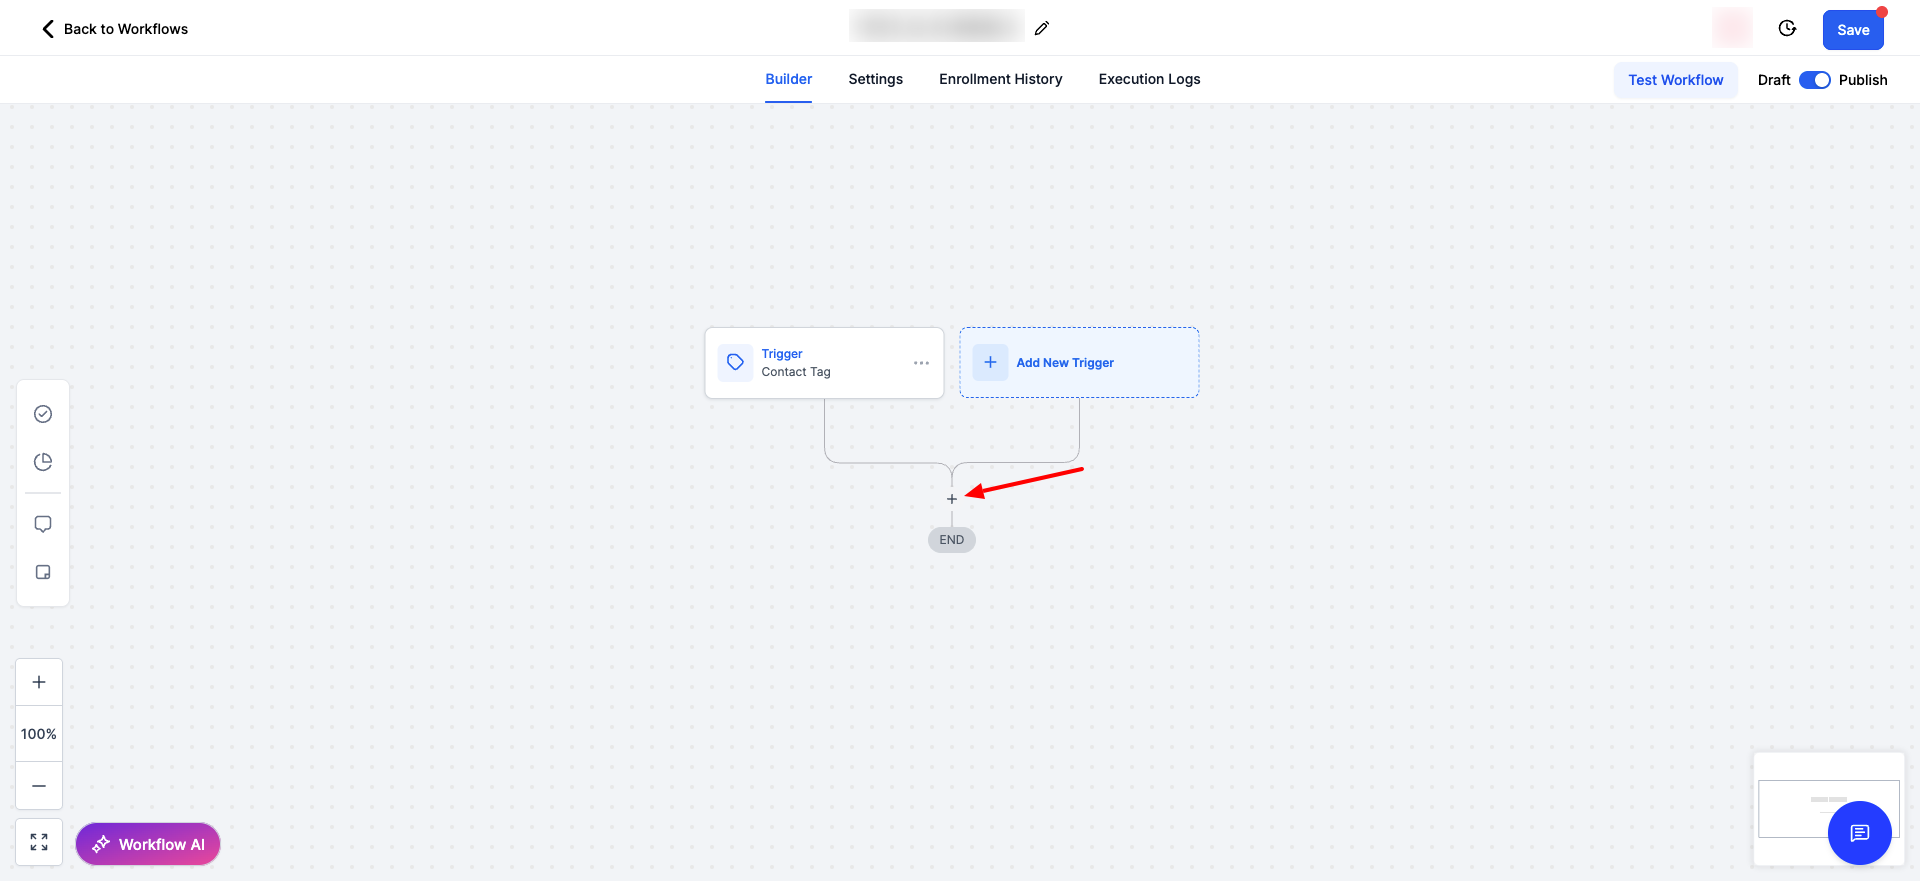
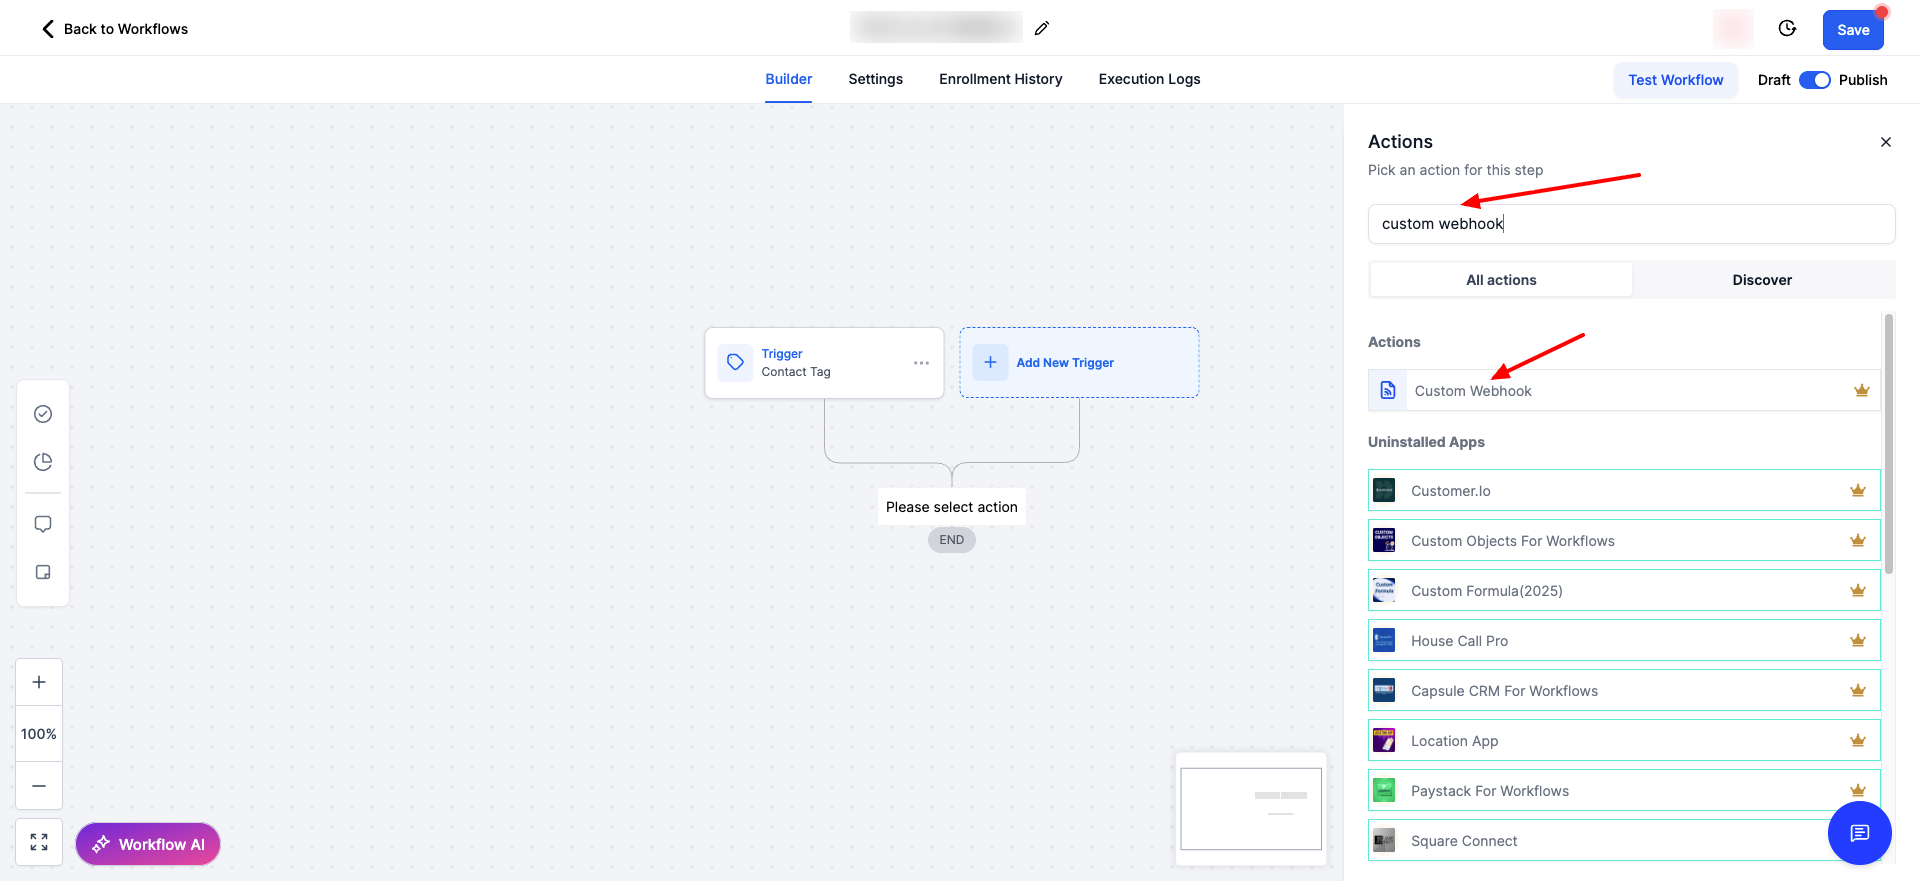
- Inside your GHL workflow, click the (+) button to add a new action.
- Search for and select the Custom Webhook action.
Step 4: Configure the Webhook
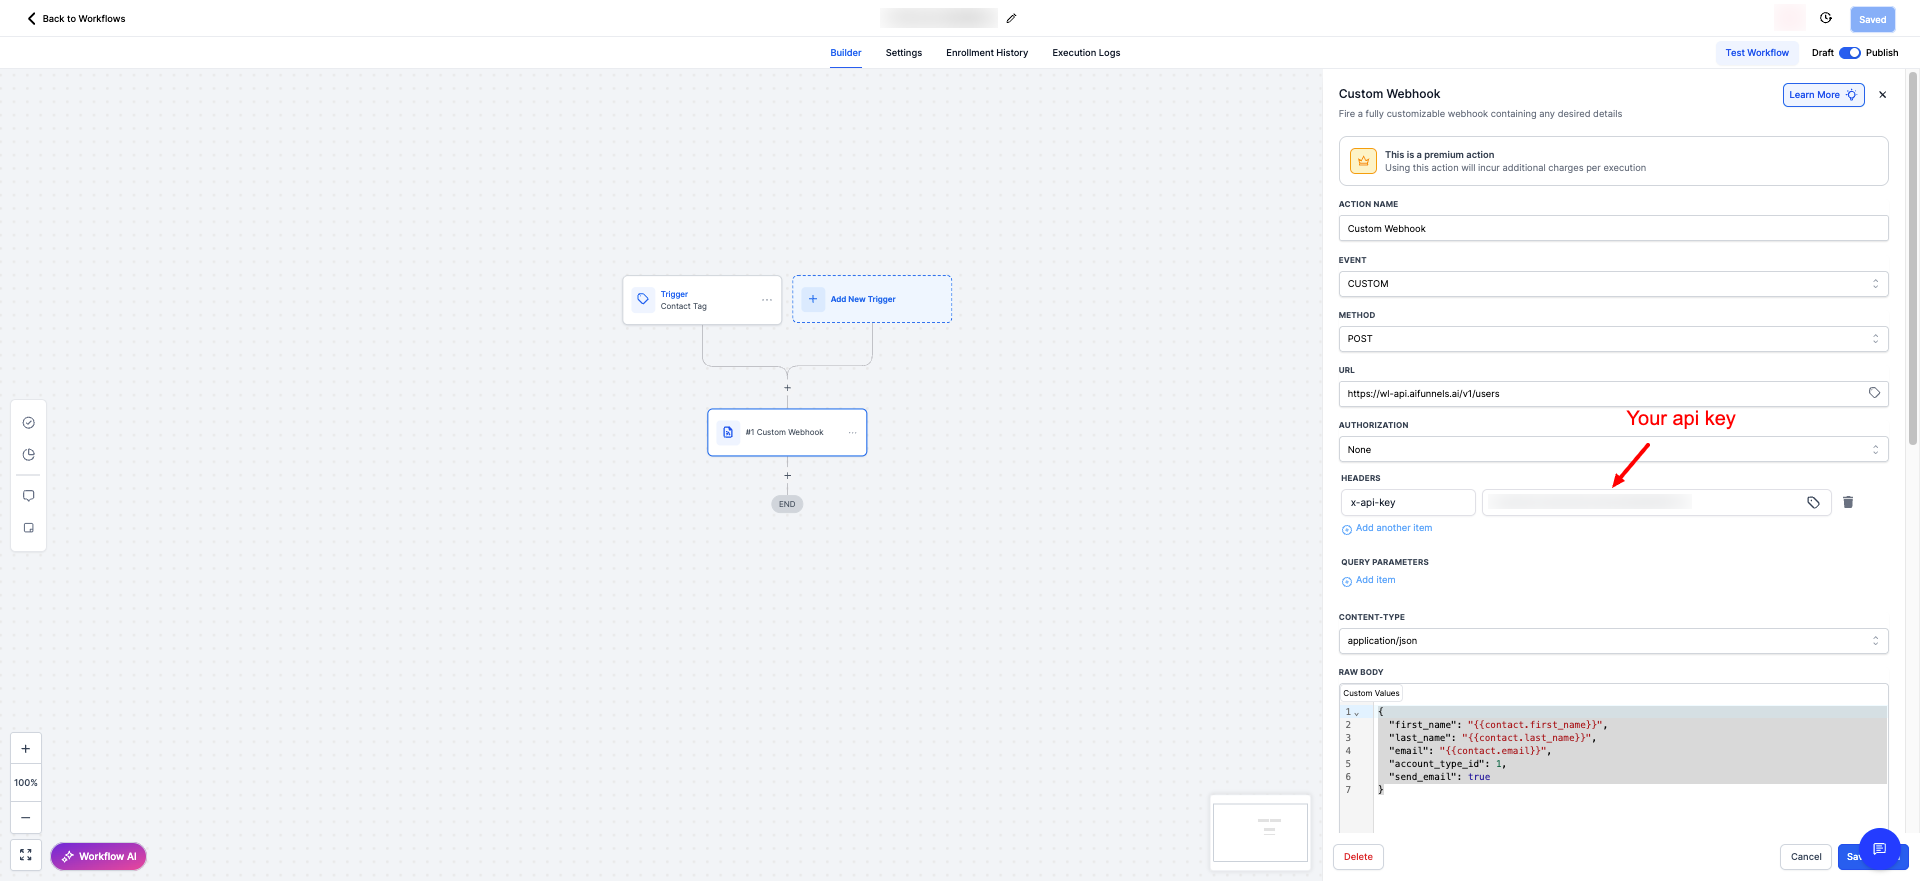 This is the most critical part of the setup. Carefully enter the following details into the webhook settings.
- Method: Set this to
POST. - URL: Enter the API endpoint URL for creating an account:
https://wl-api.aifunnels.ai/v1/users - Headers: Add one header (x-api-key) and set it to your api key from the AIFunnels
- Body: This is where you will send the user's data. You must add the following required fields:
first_namelast_nameemailaccount_type_id (can be 1 (business), 2 (agency), 5 (freemium)send_email (can be true or false)
JSON
{
  "first_name": "{{contact.first_name}}",
  "last_name": "{{contact.last_name}}",
  "email": "{{contact.email}}",
  "account_type_id": 1,
  "send_email": true
}- Note: The values in double curly braces, like
{{contact.email}}, are GHL's dynamic fields. This will automatically pull the information from the contact that triggers the workflow.
Step 5: Save and Test
- Save the webhook action within your workflow.
- To test the integration, trigger the workflow with a test contact that has an email address and a first name/last name if you included them.
- After the workflow runs, check your AiFunnels account to confirm that a new user was created successfully.
email, account_type, send_email) are included in the webhook body.